Installing and setting up the SHIVA software
Software
Scenario 1: Contact Oleg
SHIVA software: You can obtain the latest version of the SHIVA software by contacting Oleg Fryazinov.
Scenario 2: Download from GitHub
Scenario 3: Download the software from our website
Latest version of the SHIVA software (Windows only)
Older versions of the SHIVA software (Windows only)
Hardware and software requirements: Information regarding the hardware and software requirements for running the software can be found here.
Installing: Detailed instructions on how to install the software are here.
WARNING: If you are updating from a previous version of the SHIVA software to a newer version, please ensure that you first backup the version that you currently have installed i.e. by renaming or copying it to another location.
When you install the new version, the standard profiles will be overwritten and so any edits that you have made will be overwritten.
Please ensure that you only make edits/changes to the new profiles that you have created (these will not be overwritten when installing a new version).
Hardware and Software Requirements
Recommended: Ideally, you will need a fairly current computer, running the Windows 10 (64 bit edition only) operating system containing an Intel Core i5 or i7 Processor (or equivalent) and dedicated nVidia GPU. The more powerful the better. If this terminology means nothing to you, we can advise on this.
If you don’t have a computer that matches the hardware requirements listed above, you may still be able to run the software but it may run slowly or there may be problems with the graphics, especially if you try to make a more complex model. Give it a try. You can find a list of the hardware that we have tested here:
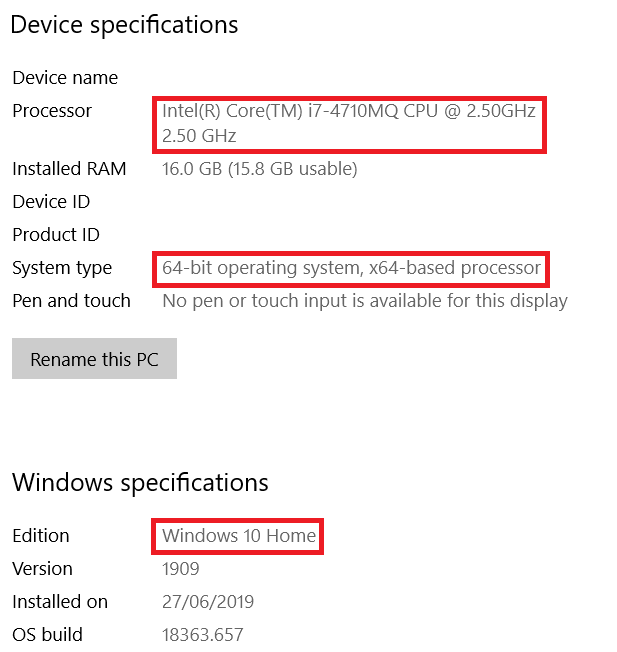
You can find out about the processor and operating system specification of your computer by right-clicking on the Windows ‘Start’ icon (bottom-left of the screen) and then left-clicking on ‘System’. For my computer, these are highlighted in red:
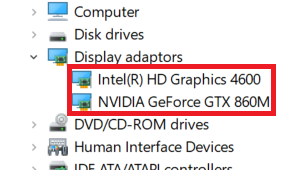
You can find out about the graphics capabilities of your computer by typing ‘Device Manager’ into the search box (bottom-left of the screen next to the Windows ‘Start’ icon) and then expanding the ‘Display adaptors’ section:
Assistive Technology requirements
Depending upon the requirements of the person who is using the software, you may need alternative access equipment suited to the individual’s access requirements, for example: a touch screen, eye gaze unit, joystick etc. Mounting of the equipment may be needed too.
Instructions for downloading and installing the SHIVA software
Downloading the software
- You can obtain the latest version of the SHIVA software by contacting Oleg Fryazinov.
Installing the SHIVA software
- Navigate to the ‘SHIVA_x64.exe’ file.
- Now run the file to install the software:
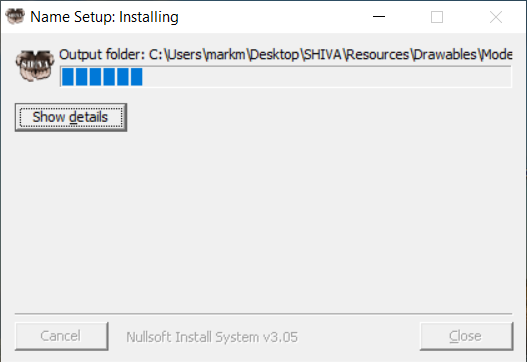
- This should create a folder (in this case, on the desktop) called ‘SHIVA‘.
- Create a desktop shortcut to the file ‘shiva-totem.exe’ contained within the desktop ‘SHIVA‘ folder and call it ‘SHIVA software‘.
- Success!
Note: You may receive an error message relating to ‘missing DLL files’ if so downloading and installing Microsoft Visual C++ Redistributable may fix this:
https://www.microsoft.com/en-gb/download/details.aspx?id=14632
Running the software
If your computer has a dedicated ‘graphics card’ (GPU) you should set up your computer to use this when running the SHIVA software. You can choose this option each time you run the software, or set up your computer to choose it automatically each time the software runs.
To do this each time:
Right-click on the SHIVA icon, then under ‘Run with graphics processor’ choose ‘High-performance NVIDIA processor’:

To set up your computer to automatically choose the graphics card each time the software runs
This is a bit more involved and depends on the type of graphics card that you have.
If your computer has an nVidia GPU, this is done using the ‘NVIDIA Control Panel’ software which should be installed on your computer*. The procedure is explained here:
https://support.lenovo.com/gb/en/solutions/ht082304
If this doesn’t work, we can help.
Please note that on some modern laptops, when the battery level is low (less than 20%) the laptop may enter ‘energy saving’ mode. This may cause the SHIVA software to run on the basic inbuilt graphics processor rather than the dedicated graphics processor mentioned above. If this seems to be the case, exit the software, plug the laptop into the mains and run the software again. Power settings can also limit the performance of the SHIVA software, so change to ‘Best Performance’ where possible.
* If not, you can install this from the Microsoft store.
Tested hardware
Successful
| GPU | CPU | RAM | Windows | Comments |
| Intel HD Graphics 615 | 10 Pro | |||
| AMD Radeon RX 570 4Gb | AMD Ryzen 3 1200 | 8Gb | 10 Home | Runs well |
| NVIDIA GeForce GTX 1050 MAX Q | Intel Core i7-10510U | 16Gb | 10 Home | Runs very well |
| Zotac nVidia GTX 680 2048MB Passmark score: 5819 | Intel Core i7-3770K @ 3.50GHz Overclocked to up to 4.7GHz Passmark score: 6598 (not overclocked) | 16Gb | 10 Pro | Runs well |
| nVidia GTX 950M Passmark score: 1965 | Intel i7-6700HQ @ 2.60GHz Passmark score: 8126 | 8Gb | 10 Pro | |
| nVidia GTX 860M Passmark score: 1994 | Intel Core i7-4710MQ @ 2.5GHz Passmark score: 7983 | 16Gb | 10 Home | |
| Intel HD Graphics 615 Passmark score: 803 | Intel Core m3-7Y30 @1.00GHz 1.61 GHz Passmark score: 2986 | 4Gb | 10 Pro | Microsoft Surface Pro (2017) |
| ATI Mobility Radeon HD 3400 Passmark score: 111 | Intel Core 2 Duo P7350 @ 2.00GHz Passmark score: 838 | 3Gb | 10 Pro | Quite a lot of lag |
Failed/issues
| GPU | CPU | RAM | Windows | Comments |
| Intel HD Graphics 3000 Passmark: 257 | Intel Core i5 2500K Processor overclocked to 4.4 GHz Passmark score: 4,070 | 4Gb | 10 Pro | Objects/Primitives do not appear on pole |
| Intel HD Graphics 3000 Passmark: 259 | Intel Core i3-2310M @ 2.1GHz Passmark score: 1205 | 4Gb | 10 Home | Objects/Primitives do not appear on pole |
| Intel HD Graphics 4600 Passmark: 673 | Intel Core i7-4710MQ @ 2.5GHz Passmark score: 7983 | 16Gb | 10 Home | Edit mode crashes |
SHIVA software update history
2020 (July)
Bug Fix: Added extension to filenames when saving
If the user did not type the filename extension, the file would be saved without one.
New feature: Display filename (and path) of current model
On the main screen, text at the bottom-right of the screen now shows the filename of the currently loaded model (if it has been given one, either through saving, or its filename when loaded).
New feature: Hide/show base and/or pole button
This button is on the ‘print/export’ screen and can be used to see how the model will look when the pole and/or base have been removed i.e. How it would look when printed.
New feature: Duplicate object feature
Added a button which duplicates the currently selected object, preserving the size and rotation. The duplicated object is added to the top of the pole. This button has been added to the main screen.
New feature: Change colour button
Added a button to change the colour of the model and pole. Selecting the button cycles through various colours including red, green, blue and yellow. This button has been added to the main screen.
New features: Added buttons to increase/decrease the width and depth of an object simultaneously
Buttons to perform both actions simultaneously. These buttons have been added to the resize screen.
New feature: Auditory feedback on button selection
Synthesised speech describes the action of the buttons when selected. This feature has been added across all screens.
Full screen mode
The window now fills the screen without close and minimise/restore buttons, preventing accidental closure. The window can still be resized using a mouse or docked using the Windows key + arrow keys.
New feature: Save-as button
A location and filename of the users choosing can now be chosen. This feature resides on the ‘print/export’ screen.
Re-scaling of the model
This occurs when the model changes. The length of the pole is altered to prevent some occurrences of the ‘long pole/far away’ view bug.
Bug fix: Edit mode corrupting screen headings
Edit mode caused some corruption to screen headings in the profiles.
Changed layout of profile screen
Now full screen mode and smaller font size are used to make profile selection easier.
Profile changes
Many changes to screens within profiles to improve usability. Including layout of cells.
New feature: Smaller minimum drill size
Smallest drill size was still quite large for finer work
Feature requests
- Auditory feedback:
- On ‘mouse over’ buttons/cells (as an option)
- During scanning
- Scanning sequence: Block, then sequential scanning. 3 blocks:
- Left: primitives/command buttons
- Middle: model rotation
- Right: command buttons
- Preview of model: Rotating slowly